
Miniature making / Project guide
Turn a beverage can into miniature corrugated roofing
A small shed, workshop or scrapyard building needs a roof that looks at home in the scene. Beverage-can aluminum gives you real metal to work with, and a hand-cranked corrugator adds the ridges that turn a flat sheet into miniature roofing material.
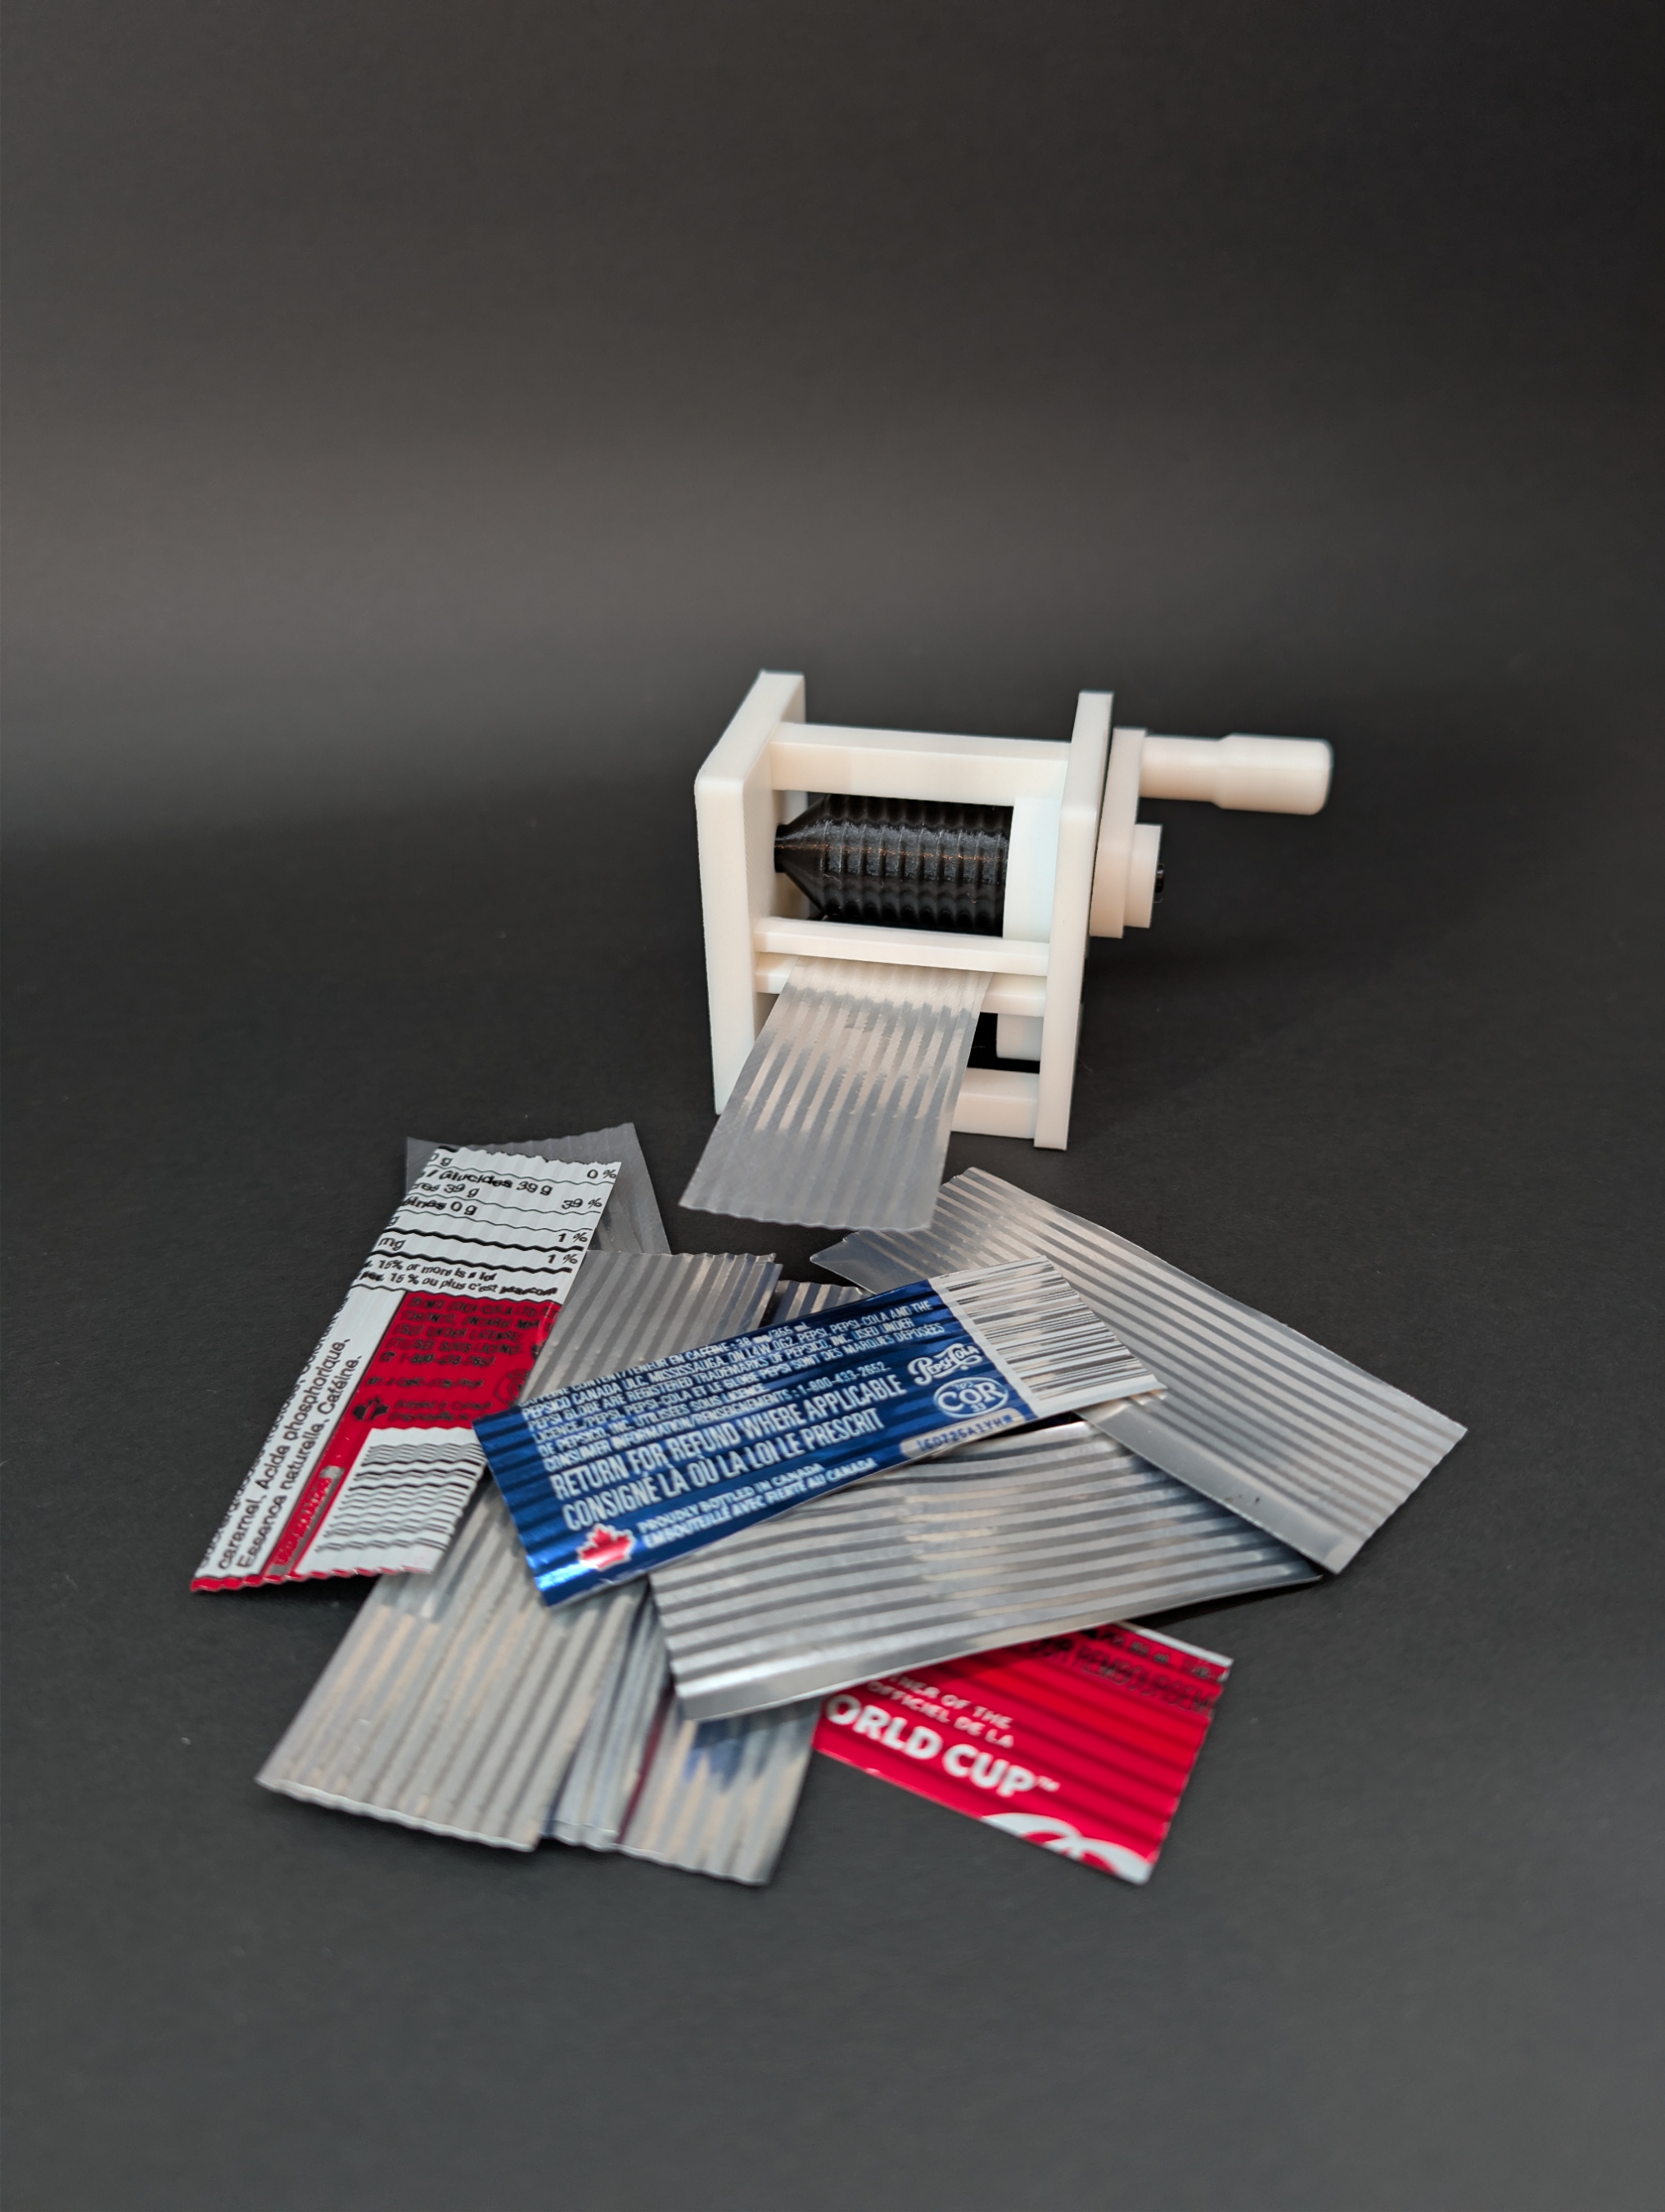
Our Pop Can Corrugator MINI V2 is a 3D-printable tool for that step. Print and assemble the tool, prepare a piece of can aluminum, then roll a sample before planning your roof panels. The project combines printed tooling with a material you might already have in the recycling bin.
The MINI V2 is supplied as paid STL and 3MF digital files. You print the parts and supply the hardware and roofing material. No assembled tool or metal panels are shipped.
What you need
- The Pop Can Corrugator MINI V2 files, a compatible 3D printer and filament suitable for the supplied print guidance.
- The five main printed parts, including the crank.
- Four BT2.5 × 14 mm self-tapping screws and a matching screwdriver.
- A clean, empty aluminum beverage can, or a prepared sheet cut from its sidewall.
- Suitable thin-metal cutting tools, a ruler, a marker and a paper roof template.
- Eye protection and appropriate protection for handling sharp sheet edges.
- A model roof or backing to fit the panels to, plus an adhesive suitable for the materials you choose.
Cut can edges and offcuts can be very sharp. The rollers also create a pinch point. Keep fingers clear of the roller gap, keep loose clothing and anything that could catch away from moving parts, and stop turning before adjusting the material. This is a workshop project, not a children's toy.
Assemble the tool before cutting roof panels
The picture-led assembly guide shows three steps: fit the two meshed rollers together, gear ends first; close the frame with three screws; then align the crank’s D-shaped socket and secure it with the remaining screw. Align the axles and keys, and tighten gently.
Turn the crank by hand and check that the mechanism moves freely before introducing material. If something binds, stop and check the assembly rather than forcing it.
Start with the main corrugator assembly. The optional press-test dies in the download are separate from this roofing workflow.
Make a sample from the can sidewall
Clean and dry the can first. Using tools intended for the job, prepare a piece from the thin sidewall rather than the thicker top or base. Keep control of the sharp edges and collect the offcuts as you work. Do not run your fingers along a cut edge.
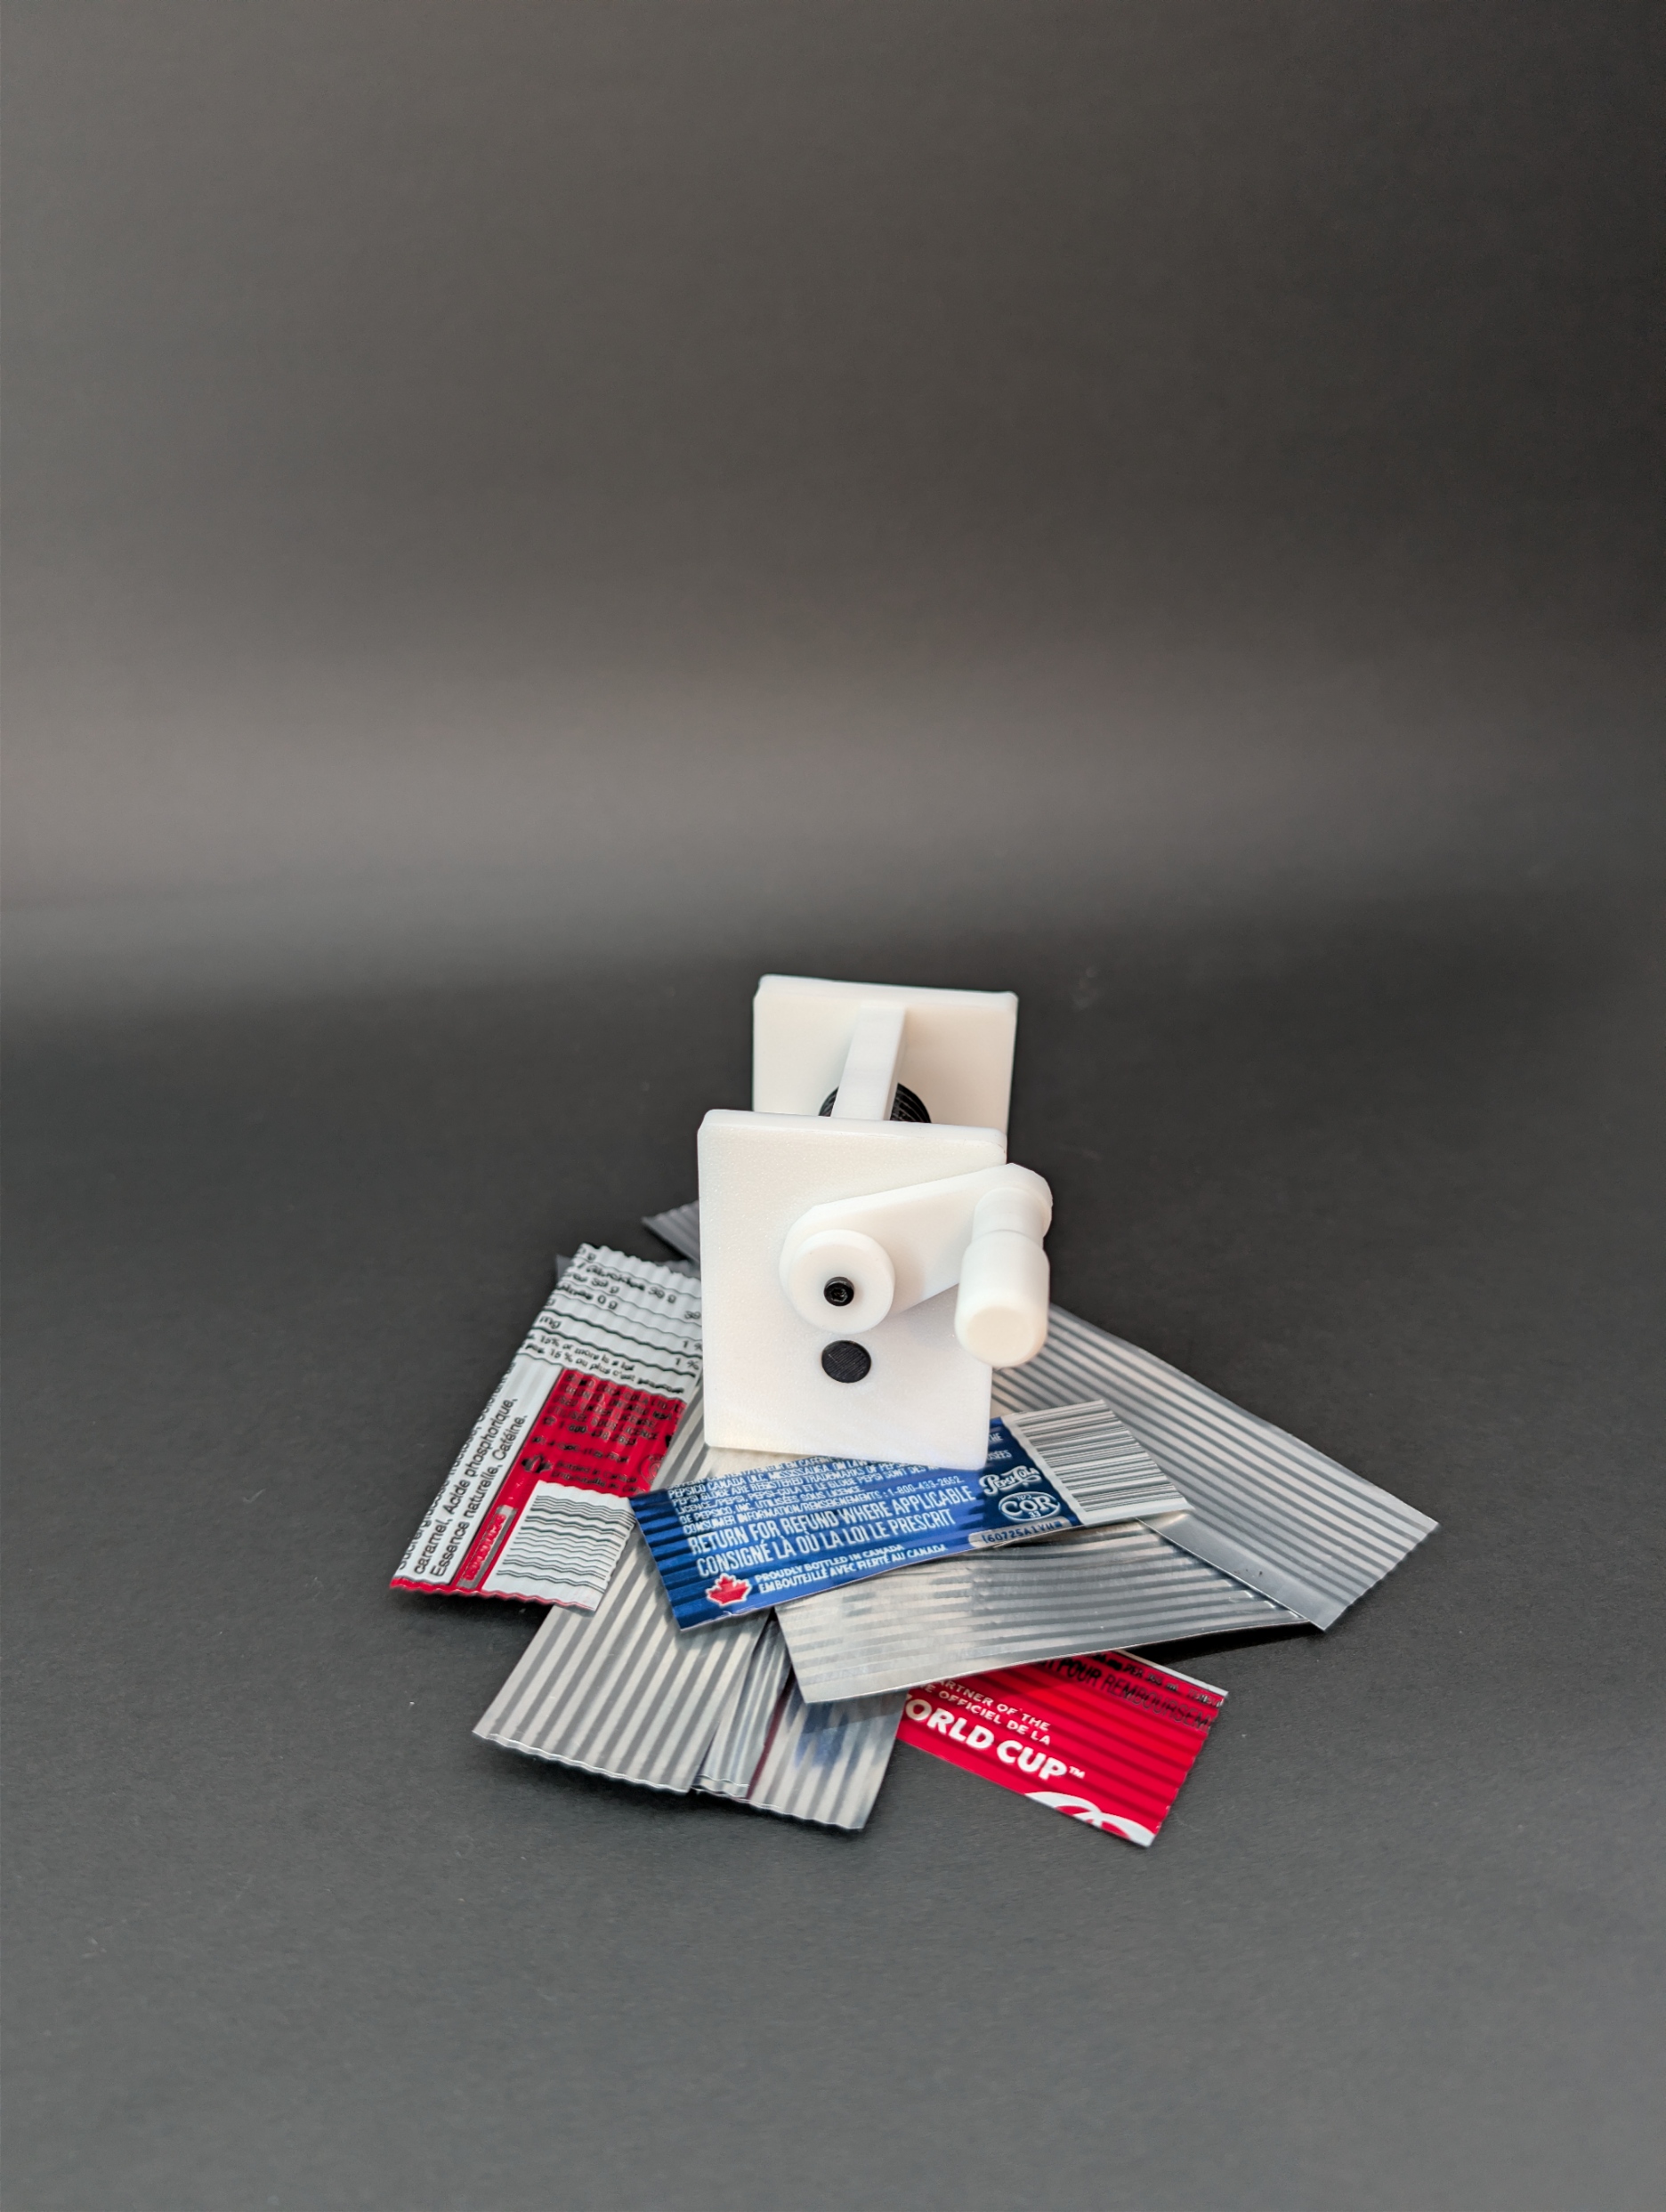
Begin with a small test piece that fits the tool. Check the product guidance before use; do not assume the MINI can accept the full width of a can sidewall. Operate the crank by hand, keep fingers away from the rollers and stop if the material catches or the mechanism binds.
That first sample is useful for more than checking the tool. Hold it beside your model and judge the spacing and depth of the ridges against the building, doors and other details. A texture that suits one scene may look too large for another. Check it on the actual model before making a batch.
Fit the roofing to the model
Make a paper template of the roof first, including any overhang you want. Use it to plan the panel layout and any overlaps.
Corrugating changes the shape of the sheet, so measure the formed sample rather than assuming a flat blank will cover the same width afterward. Leave trimming allowance, form the material, then work toward the final panel size. Dry-fit each piece before gluing it down.
For a simple pitched roof, arrange the ridges from the high edge toward the eaves. Check neighboring panels together so the lines and overlaps look deliberate. A small offcut is a good place to test adhesive or a paint finish before applying either to the roof.
You can leave the metal visible or try a painted, weathered finish. Any worn or rust-coloured appearance is a decorative effect you add, not a finish produced by the corrugator. Check the instructions for your chosen coating and test it on a spare piece first.
Print the tool for your next miniature build
If you have a 3D printer and want to make your own small metal roof panels, the MINI V2 gives you the printable tooling for the corrugating step. You supply the four screws, prepare the aluminum and fit the finished pieces to your scene.
Get the Pop Can Corrugator MINI V2 STL and 3MF files on Cults.
Check the listing for current pricing, package details and print guidance before buying. This is a digital download, not a physical corrugator.