
Strap joiners / Product guide
Straight, L, T, X or Y: which cosplay strap joiner do you need?
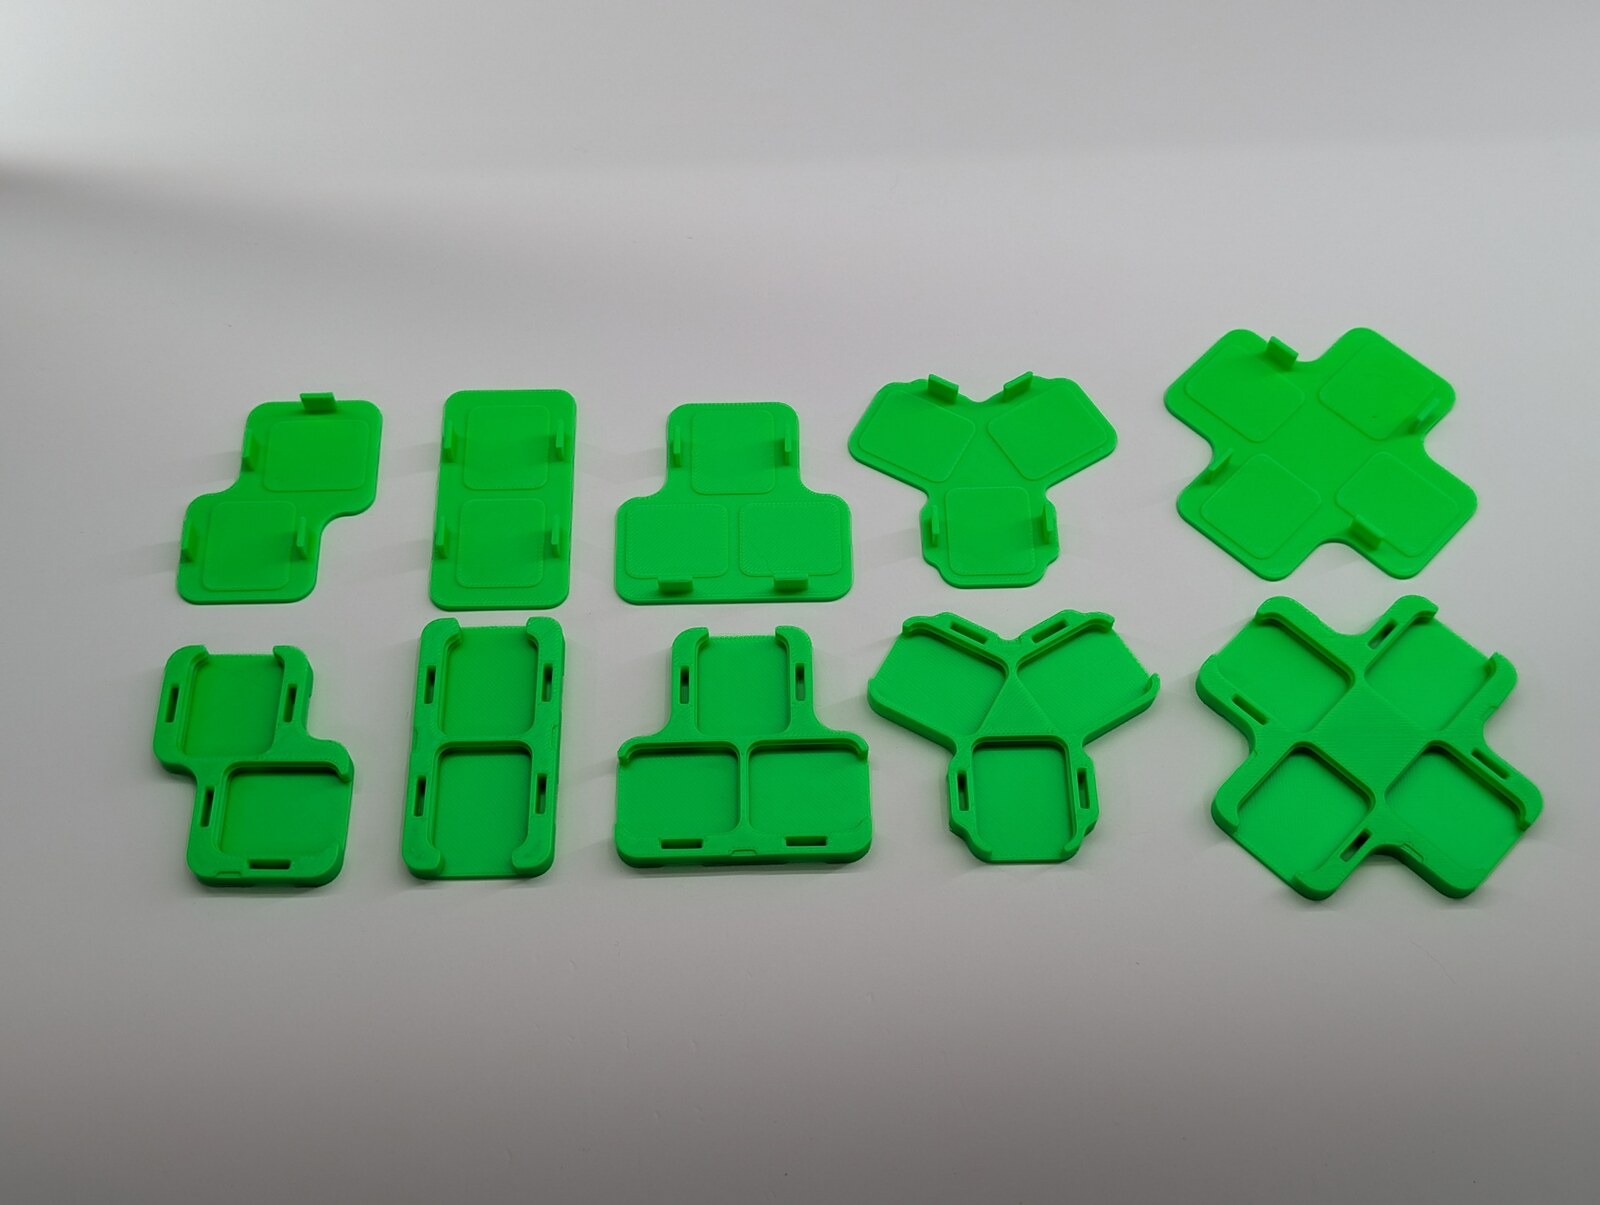
Start with the route your straps need to take. Are two ends meeting in a line? Does the route turn a corner? Do three or four straps meet at one point?
The Forest City Layers Modular Armour Attachment System has five joiner shapes for those different layouts. Each shape has a matching base and cap or lid. Choosing between them starts with the direction of the straps, followed by a fit check with the parts you actually plan to use.
What each shape does
Straight: two straps in line
The straight joiner brings two strap ends together along one route. Start here when your layout calls for a junction that continues in the same direction.
L: a change of direction
The L joiner turns the strap route. It is the shape to consider when two straps need to meet around a corner in your layout.
T: a three-direction branch
The T joiner creates a three-way junction. Look at where each of your three strap routes approaches the junction, then compare that arrangement with the T shape.
X: a four-way junction
The X joiner brings four strap routes to one junction. Count the ends you need to join before choosing it; the extra branch only helps if it belongs in your planned layout.
Y: an angled three-way junction
The Y joiner also has three branches, arranged as an angled junction. If you are deciding between T and Y, compare the direction of each strap rather than choosing from the number of branches alone.
The product guide shows all five shapes with their caps open and seated.
Plan one junction at a time
Before printing a full set, sketch a single junction and answer three questions:
- How many strap ends meet here?
- Which direction does each strap need to go?
- Is there room for the joiner and access to the connection in the planned layout?
Keep the sketch simple. A few lines and a note of the parts you intend to use are enough to compare the five shapes. For example, two lines meeting around a corner suggest checking the L joiner first. Three lines call for a closer look at T or Y.
That gives you a starting shape to test. It does not establish how the finished assembly will fit or perform.
Check the exact parts together
Keep each base with the cap or lid for that same joiner shape. The product photographs show Standard strap ends in the joiners; those photographs do not establish compatibility with every strap variant.
Print a small test assembly, check the exact strap fit and check the space around the junction before committing to a batch. Follow the supplied instructions for the selected parts. The package's 3MF files contain geometry, so you still need to set up and inspect the print in your slicer.
A joiner handles a strap junction. Shell attachment uses separate mounting hardware. Check the whole planned connection, including its mounting points, instead of judging it from the joiner alone.
What the photographs can tell you
The guide's joiner photographs show real printed parts with Standard strap ends, both open and capped. They do not show that every joiner shape has been installed or worn in a costume.
The system has no numerical load rating. Use it for cosplay attachments, not body-weight support or protective equipment. Your own fit and assembly checks remain important.
Find the files and instructions
The complete digital system includes 71 printable variants, supplied as 71 STL files and 71 matching 3MF files. The five joiners account for ten of those variants: five bases and five matching caps or lids.
The files are for personal, non-commercial use under the listing licence. You print the parts yourself; filament, magnets and physical parts are not included.
Explore the Modular Armour Attachment System and its current download options.
Source checked 15 October 2026: Forest City Layers product guide.